
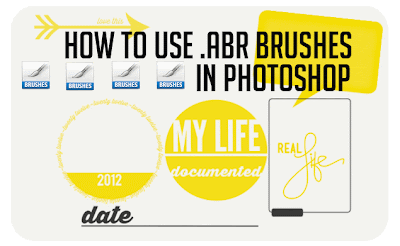
Photoshop Brushes are fun, and easy to use. Don't be afraid!
No Photoshop?
No Problem.
We always include .png files in our free brush sets.

1. INSTALL

Depending on your version of photoshop (CS series or elements), and if you are working on a mac or a pc; there are a few ways to install brushes.
To keep it simple- if you can find your brush presets> choose Load, then import the brush set!
For me, I am on a mac and working on Photoshop CS5. I simply drag and drop my .abr brush set into photoshop, or just double click and they are installed.

- When I was using photoshop Elements, this tutorial from Texas Chicks was a gem!
2. CREATE

For the free brushes that we are giving you today, it is best to use them with 4x6 images.
I shot these photos in RAW format, so they are much larger than they need to be. I cropped them to 4x6 at 300dpi.

Once your image is ready, add and select a NEW layer. With the new layer active; choose your brush.
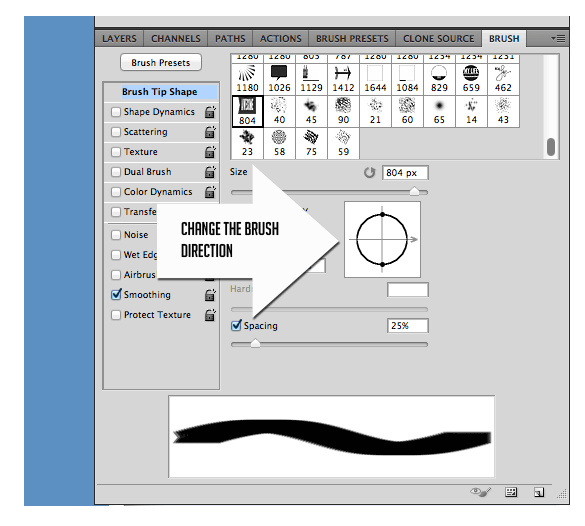
You can change the direction of the brush (great for arrows!). Experiment with the opacity, the texture and the size.
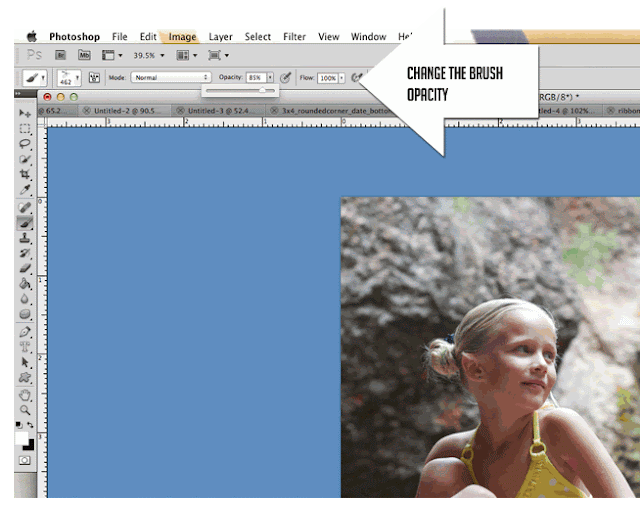
Remember to create a NEW Layer for each new brush.
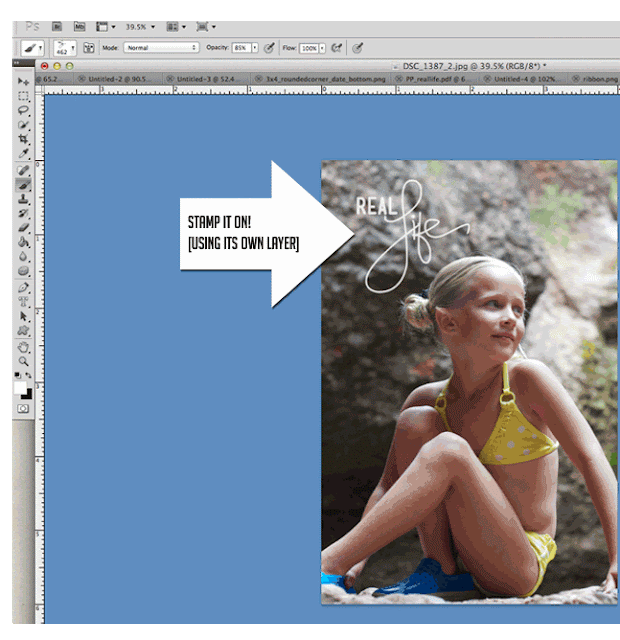
Flatten. Save. Done!


.png stands for "portable network graphics" and was developed mainly to deal with shortcomings of the .gif
.png files have a transparent background which allows you to change the color, opacity & texture without influencing other elements.
MOST photo editing programs will support .png formats. (my memories suite is one)

This free brush download also includes a folder
of .png files and is available at persnicketyprints.com/digifreebies.
Please do not share the download link with others. You are however, welcome to point them here.
- HAVE FUN!
Please do not share the download link with others. You are however, welcome to point them here.
- HAVE FUN!
*Persnickety Prints, inc. is not affiliated with Adobe. Please visit the adobe support page for software help.

THANK YOU sooo much! You guys are always too generous!
ReplyDeleteLove these. and the tutorial! THANKS
ReplyDeleteAwesome!! Thanks!!!
ReplyDeletei am having problems with downloading help
ReplyDeletewhat kind of problems?
Deletewhen i click on download on your face book face it leads me to another page and i click on save but i can't download. is their another way i can download or am i just silly . i really need some help with computers.
Deletepleese help me
DeleteAre you a FB FAN?
DeleteAre you clicking this link? http://statictab.com/fm27j72
Then click "download here"
You will go to box.net to grab the freebie (this is where it's hosted)
I don't use brushes nearly enough. Thanks for these freebies...they may just change that!
ReplyDeleteThese are AWESOME!! Thanks so much. :)
ReplyDeleteKOOL...Thanks!
ReplyDeleteThank you!!!
ReplyDeleteThank you ! Love the brushes.
ReplyDeleteI prefer to do my project life layouts in PS Elements vs. CS5 and was wondering if there is a way to rotate the brushes in PSE. I absolutely LOVE these brushes and am so happy to have found the...I'd love to be able to use the simple outline one on horizontal photos as well. Thanks!!!
ReplyDeleteOne more thing-- especially for Project Life (4x6 prints) - make sure to not put really important things right to the edge- we need about 1/8" bleed
Deletenevermind...just found it :)
ReplyDeleteJenna-
DeleteYou can flip them a few ways! Make sure you are stamping your brushes on a separate layer. Changing the arrow/direction in the Brush window is one way. You can also rotate it (when it's on it's own layer) by using the move tool (v).
Have fun!