
You may have heard of a little film festival called Sundance?
Persnickety Prints is located in Orem, Utah... which is at the base of Provo Canyon and the Sundance Resort.
The Film Festival is in full swing right now. Being a local has it's perk's. You can get into party's and movie premier's simply by knowing the right people- or at least pretending to know the right people.


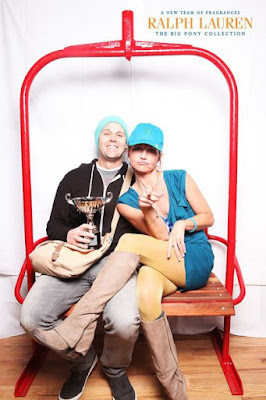
Upon arrival we were given a wristband to wear.. and what do you know... these wristbands were scented - those Ralph Lauren marketing geniuses! So the whole place smells like one of these 4 new fragrances. I had blue- the scent is still lingering...

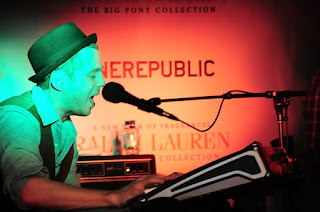
This Ralph Lauren debut was all based around digital media, and social networking- nope, facebook isn't going anywhere!
A digital photo booth complete with a vintage ski lift enables guests to immediately upload and share their photos with friends on Facebook and Twitter at a custom iPad station. Read more about the marketing tactics of this event here... what it comes down to, if you don't have a facebook or twitter account, you don't get to play!
Anyone love that first season of the Bachelorette? Yes, Tristan and Ryan are still together!

It was a good night.
(thanks mom for babysitting!)
So speaking of facebook- and all of it's powers- I have been meaning to show you some ways to juice up that profile picture of yours. You can use this to your advantage- and "stand out" from the crowd!
Here is our Persnickety facebook profile picture.

Facebook is always changing things, but for now you can have a profile picture of 200x516 pixels.
Why would you want this? Well... because it gives you more room to shout, that's why. You have 200x516 pixels of shout space, and until everyone else catches on, you will be "different".
Different is Good.
If I were a designer, like my friend Deena Rutter... and I just finished a great new kit... I may want to shout about it, or put it in your face... like so...

Ok... so how do I fit my picture or logo in that tiny little square facebook uses for the news feed?
A-ha... you can edit it!
Facebook PAGE
Once you have created your new 200x516 profile image, upload it by hovering over your profile picture, choosing the little pencil, it should say "change picture".
Upload. Refresh.
Hover over your profile picture again and this time choose "edit thumbnail"

Now drag the image around until it is cropping the portion that you want in the news feed. Click Save.
That's it! Done.

You can do this to your personal profile as well.. but the steps will look a little different.

Do you have something to say, and need some shout space?
Here are some .psd templates to help get you started.


Here is the very template I used for Deena's facebook sample.
Download it HERE.
Hope this helps- we would love to see what you have to say! Post your new profile pic on our fb wall!
-Chari
Awww--- wish I was a "local"! Thanks for the templates too!
ReplyDeleteYou are a genius! Thanks for the template!
ReplyDeleteI want live video!
ReplyDeleteHow do you attach the link to the finished product that allowed me to drag & drop that up into my Toolbar! THAT WAS COOL, TOO!
ReplyDeleteThank you; I'm going to try this out!
ReplyDeleteAwesome! Thank you.
ReplyDeleteLove love love the photo booth photo!
ReplyDeleteI got it. Thank you!
ReplyDeleteI am off to make mine! Thanks so much!
ReplyDeleteVery cool! Thank yoU!
ReplyDeletethank you for the tip! :)
ReplyDeleteGot it to work, thanks!
ReplyDeletethanks for this, great idea!
ReplyDeleteThanks for the templates! I was feeling too lazy to make my own. Persnickety rawks!
ReplyDeleteThank you so much for the tutorial how to edit the thumbnail.
ReplyDeleteI actually re-made a button putting what I wanted as my thumbnail in a different place on my button because I didn't think you could change it...haha!
Thanks so much--LOVE your blog...will definitely be coming back here!